Circuit Breaker Switch Test:What is a circuit breaker switch test and why is it important?
Q: What is a circuit breaker switch test and why is it important?
A: A circuit breaker switch test evaluates whether a breaker correctly trips and interrupts current under fault conditions. It typically involves primary injection, secondary injection, or simple push-to-trip checks. This test is critical because a breaker that fails to trip can cause equipment damage, electrical fires, or electrocution. Regular testing verifies mechanical operation, trip unit calibration, and insulation integrity. According to NFPA 70B and NETA standards, routine testing helps ensure reliability and compliance. Without testing, a silent failure may only be discovered during an actual fault, when it is too late to prevent hazards.
Q: How do you perform a basic circuit breaker switch test?
A: A basic test starts with de-energizing and locking out the breaker. For a simple push-to-trip test, press the designated test button and verify the breaker trips. For more thorough testing, use a primary injection test set to apply a simulated fault current through the breaker. Observe the trip time and compare it to the manufacturer's time-current curve. Also check mechanical operation by manually switching the breaker on and off several times. Finally, measure contact resistance with a micro-ohmmeter. Always follow safety procedures and wear appropriate personal protective equipment.
Q: What equipment is needed for circuit breaker switch testing?
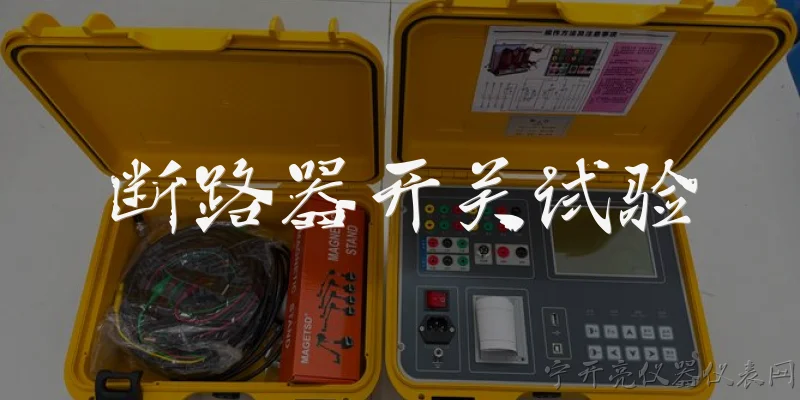
A: Common equipment includes a primary injection test set, secondary injection test set, digital low-resistance ohmmeter, insulation resistance tester, and a timing device. For low-voltage molded-case breakers, a simple push-to-trip tool may suffice. High-voltage breakers require more sophisticated test sets that can simulate fault currents up to thousands of amperes. You also need a multimeter for voltage and continuity checks, and a phase rotation meter if applicable. Always use calibrated instruments and maintain test records. Personal protective equipment such as arc-flash suits and voltage-rated gloves is mandatory for safety.
Q: What are the common failure modes revealed by circuit breaker switch tests?
A: Testing can reveal several failure modes: mechanical binding or lubrication failure that prevents the breaker from tripping; worn contacts causing high resistance and overheating; a faulty trip unit that does not respond to fault current; and insulation breakdown leading to leakage. Other issues include misalignment of the operating mechanism, loose connections, and incorrect rating or settings. A push-to-trip test may pass while a primary injection test fails, indicating a trip unit problem. Regular testing helps identify these issues early, allowing repair or replacement before a dangerous failure occurs during normal operation.
Q: What are the safety precautions for circuit breaker switch testing?
A: Safety is paramount. Always de-energize and lock out the circuit before testing, unless live testing is absolutely necessary and performed with proper arc-flash protection. Wear appropriate personal protective equipment: arc-rated clothing, safety glasses, insulated gloves, and hearing protection. Use insulated tools and test leads rated for the voltage. Ensure a second person is present as a safety observer. Barricade the testing area and post warning signs. Follow NFPA 70E and OSHA guidelines. Never bypass safety interlocks. After testing, verify the breaker is returned to its correct position and re-energize carefully.
Words of experience
Common scenarios of "Circuit Breaker Switch Test"
【Tester】 Good morning, everyone. Today we're conducting the circuit breaker switch test as part of our regular maintenance schedule. I'm the lead tester, and I'll be guiding you through the process. Let's start with a brief overview. The purpose of this test is to ensure that the circuit breaker operates correctly under fault conditions. We'll be testing the switch mechanism, the trip unit, and the overall coordination with the protection system.
【Engineer】 Thanks for the introduction. As the responsible engineer, I'd like to add that this test is critical for safety and reliability. We need to verify that the breaker opens and closes within specified times and that it can interrupt fault currents without damage. I'll be monitoring the test parameters and ensuring we stay within safe limits.
【Technician】 I've prepared the test equipment and the breaker is isolated and ready. I've also set up the temporary overcurrent relay to simulate faults. Just to confirm, we're testing the 11kV breaker on feeder 7, right?
【Tester】 That's correct. Feeder 7, 11kV vacuum circuit breaker. We'll start with a simple close-open operation to check the basic mechanism. Technician, please confirm that the breaker is in the open position and that all safety locks are applied.
【Technician】 Confirmed. Breaker is open, spring charged, and control power is available. Safety locks are in place. Ready for the first operation.
【Engineer】 Before we proceed, let's double-check the trip circuit. I want to ensure that the trip coil is energized correctly and that there are no loose connections. A failure here could lead to a false test result.
【Technician】 I've checked the trip coil resistance and it's within tolerance. Wiring is secure. I'll now initiate a close command. Stand by.
【Tester】 Breaker closed successfully. I observed the closing time from the oscillograph: 45 milliseconds. That's within the acceptable range of 40-60 ms. Now let's open it. Technician, issue an open command.
【Technician】 Open command issued. Breaker opened. Opening time recorded at 38 milliseconds. That's also within the 30-50 ms range.
【Engineer】 Good. Now let's move to the trip test. We'll simulate a fault by injecting current into the relay. I'll set the relay to pickup at 1.5 times the rated current with a time delay of 0.1 seconds. Technician, please apply the test current.
【Technician】 Applying test current now. Relay picked up and issued a trip signal. Breaker tripped. Trip time from signal to contact separation was 42 milliseconds. The breaker lockout relay also operated correctly.
【Tester】 Excellent. That confirms the trip circuit integrity and the breaker's ability to trip on command. Now let's test the breaker's interrupting capacity. We'll use the synthetic test circuit to simulate a high fault current. Engineer, are the test settings ready?
【Engineer】 Yes, the synthetic circuit is set to produce a fault current of 20 kA symmetrical. The breaker's rated interrupting capacity is 25 kA, so this is within its capability. I've also set up the voltage and current probes for accurate measurement.
【Technician】 Charging the synthetic circuit now. Capacitor bank charged to the required voltage. Ready to initiate the test. I'll trigger the breaker to close into the fault and then trip. Everyone, please stand clear.
【Tester】 Test initiated. Breaker closed into the fault and tripped. The oscillograph shows a clean interruption with no restrikes. Arcing time was 12 milliseconds, which is well within the breaker's specification. No visible damage to the contacts.
【Engineer】 I'm reviewing the data. The let-through current was limited as expected, and the breaker's dynamic resistance behaved normally. I'm satisfied with the performance. However, I noticed a slight asymmetry in the current waveform. Could be due to the test circuit, but let's note it for further analysis.
【Technician】 I'll take a closer look at the connections and the timing of the trigger. Might be a minor synchronization issue. But overall, the breaker performed well. I'll now proceed to check the mechanical operation counter and the condition of the arc chamber.
【Tester】 Good. After that, we'll do a few more close-open operations to ensure consistency. Then we'll test the auxiliary contacts and the anti-pumping feature. Engineer, do you want to add any specific tests?
【Engineer】 Yes, let's also verify the trip circuit supervision relay. It should detect a loss of trip supply continuity. We can simulate an open circuit in the trip coil and see if the alarm operates. That's an important safety feature.
【Technician】 I've completed the mechanical checks. Arc chamber looks clean, contacts show minimal wear. I'll now set up the trip circuit supervision test. Disconnecting one side of the trip coil to simulate an open circuit. Alarm should activate within 5 seconds.
【Tester】 Alarm activated in 3 seconds. That's acceptable. We've now completed all planned tests. Let's compile the results. Overall, the breaker passed all functional tests with minor observations. Engineer, please prepare the test report and include recommendations for next maintenance.